


Wallpaper Decor Ideas: How to Pick Patterns, Textures and Installation Tips for Every Room
Wallpaper decor can transform a room, but pattern, texture and material choices often get treated as afterthoughts until seams, fading or moisture damage appear. This guide gives practical rules for choosing pattern scale and textures, recommends materials for wet and high-traffic spaces, and walks through measurement, ordering and installation tips to avoid waste and visible seams. Use these rules to decide between DIY and hiring a pro, and to coordinate wallpaper with your existing finishes.
1. How pattern scale and repeat affect a room
Pattern scale controls the room more than color. A wallpaper motif that is too small reads as texture at a distance and can make a small room feel busy; a motif that is too large becomes the dominant architectural element and can overwhelm modest ceiling heights. Use scale to either recede the wall or turn it into a deliberate focal surface.
Scale rules of thumb
- Small motifs (repeat ~10 to 15 cm): Best for narrow corridors, compact bedrooms and kids room wallpapers where you want pattern without visual heaviness.
- Medium motifs (repeat ~15 to 40 cm): The most versatile choice for living room wallpaper designs and office wall decor; sits well on standard 2.7 to 3 m ceilings.
- Large motifs (repeat >40 cm): Reserve for focal walls with ceiling height above 3 m or continuous runs wider than 3 m; works well with contemporary wallpapers for home decor when you want a strong visual statement.
Repeat types and installation consequences
- Straight match: Vertical elements align strip to strip. Least waste and simplest to install; preferred for peel and stick wallpaper and narrow repeats.
- Half drop: Every other strip is offset vertically. Creates dynamic pattern flow but typically increases waste by 15 to 25 percent and demands careful cutting at doorways and corners.
- Drop match / complex repeats: Large florals and murals often need specific alignment points. Expect higher material usage, more seams to check, and longer install time.
Practical tradeoff: Large-scale patterns simplify furniture placement and hide wall imperfections, but they raise material costs and installation difficulty. Small repeats are economical and forgiving on seams but can register as visual noise when paired with patterned upholstery or busy flooring.
Concrete Example: If you pick a 60 cm botanical motif for a living room with a 3.2 m ceiling and a 3.5 m wide focal wall, expect each drop to be cut to full height and to lose extra length when doing a half drop. In practice that means ordering roughly 15 percent more wallpaper than simple area calculations suggest. Request a test strip before committing and compare it in the wall light.
Real-world judgment: Many installers and homeowners underestimate how lighting changes perceived pattern scale. A large, low-contrast motif that looks subtle in a showroom will punch more strongly in a north-facing Mumbai room with indirect light. Always view a full-width sample on the target wall and under the room lighting rather than judging from a small swatch.
Order physical samples and hang a test panel. Pattern scale and match type determine waste and installation complexity more than aesthetic preference alone.
Next consideration: Measure wall height and width, note the pattern repeat from the sample, and calculate overage before you order. If the repeat is large or the match is complex, schedule a qualified installer to reduce waste and visible mismatches.
2. Wallpaper materials and textures explained with room recommendations
Material choice controls durability and maintenance as much as pattern. In the Mumbai region you must pair visual intent with performance: wet-season humidity, cooking grease in kitchens and heavy foot traffic in living areas change which materials actually work. See Manix Global wallpapers for regional samples and delivery options.
Reading labels and what they mean on the wall
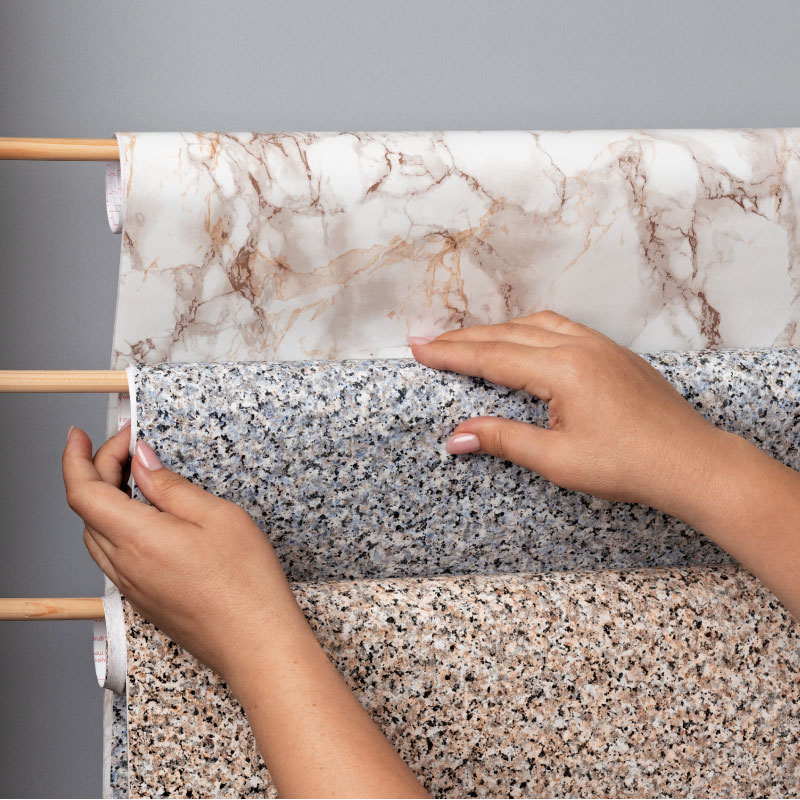
Quick decoding: vinyl coated means a washable surface over paper – good for kitchens; vinyl backed or PVC backed means moisture resistant and can be used in bathrooms; non woven is tear resistant and strippable dry; grasscloth and natural fibers are porous and decorative only; foil gives metallic finish but shows flaws and seams; embossed adds tactile depth and hides minor defects.
| Material | Practical strength | Best rooms | Key limitation |
|---|---|---|---|
| Washable vinyl | High – scrub resistant, long lasting | Kitchens, entryways, family rooms | Shows heavy seams if not installed carefully |
| Non woven | Medium – breathable, easy removal | Bedrooms, living rooms, rental units | Not ideal where frequent wet cleaning is needed |
| Grasscloth / natural fiber | Low – delicate and porous | Formal living, feature walls out of direct sun | Absorbs moisture, difficult to clean |
| Foil / metallic | Medium – decorative impact | Dining rooms or small accent areas | Reflectivity can reveal imperfections and make seams visible |
| Embossed / 3D textured | Medium-high – hides uneven plaster | Hallways, stairwells, accent walls | Collects dust; textured cleaning is harder |
| Peel and stick / self adhesive | Variable – instant fit, removable | Short-term installs, rentals, temporary decor | Adhesive can fail in prolonged humidity without premium product |
Practical tradeoff: textured surfaces hide cracks and skim-coat ripples but trap dust and are harder to repair. Metallic finishes lift a scheme fast but demand near-perfect substrate prep and controlled lighting to avoid glare.
Concrete Example: In a Panvel apartment kitchen with an open plan to the living room choose a low-sheen washable vinyl for the cooking wall and a non woven linen texture for the living room focal wall. The vinyl will take grease and wet cleaning; the non woven keeps the living area breathable and is simpler to remove when tastes change.
Real-world judgment: many homeowners pick grasscloth for an entire room because it reads as luxury in a showroom. In practice it ages poorly in humid climates and should be limited to a protected feature wall or paired with mechanical ventilation. Peel and stick is useful for quick updates but treat it as a medium-term solution unless you verify adhesive specifications for monsoon conditions.
3. Color, lighting and coordination with other finishes
Light changes the wallpaper more than you expect. A printed motif that reads muted in a showroom can look vivid under warm LEDs or washed-out in a shaded north-facing room. Treat lighting as part of the material specification.
Assess the room lighting before you decide
Check three lighting states on-site. Bring a full-width sample and look at it in bright daylight, after sunset with the room’s actual lamps on, and under any task lighting (kitchen downlights, bedside lamps). Colors shift; contrast changes. If the wallpaper has metallic inks or pearlescent finishes, inspect for glare and hotspots under the exact fixtures you plan to use.
- Practical checkpoint: Inspect the sample at the same time of day when the room is used most (morning for kitchens, evenings for living/dining).
- Fixture matter: Warm LEDs push undertones toward orange; cool LEDs favor blues. Swap a bulb temporarily if you want to preview alternatives.
- Avoid metamerism surprises: View the sample under at least one fluorescent or LED source and natural light to catch color mismatches that only show under certain light types.
Coordinate wallpaper with floors, laminates and metal finishes
Align temperature and finish, not the exact hue. Trying to match a wallpaper swatch to a laminate plank by eye usually fails because wood has complex grain and sheen. Instead, match the color temperature (warm vs cool) and choose a compatible sheen level – matte wallpapers pair better with satin woods; metallic wallpapers work with polished metal accents but demand near-perfect installation.
Trade-off to accept: High-reflective wallpapers make a compact room feel lively but will reveal any wall imperfection and introduce glare at certain angles. Low-sheen textured wallpapers hide flaws and sit well with patterned flooring, but they reduce perceived brightness and can accumulate dust in the texture.
Concrete Example: In a 3 BHK Navi Mumbai flat with warm teak laminate and recessed warm downlights, choose a wallpaper with a warm undertone and low sheen — for instance, a textured non woven in beige-ochre. That keeps the palette cohesive and avoids metallic highlights under the downlights. If you want drama, introduce a small run of a low-glare metallic behind the dining table where you can control the light with a dimmer.
What homeowners get wrong: Many attempt a pixel-perfect color match between wallpaper and flooring sample. That rarely survives live lighting and aging. A better rule: pick a wallpaper that relates to other finishes through undertone and scale, then use trims or laminate edges as the color bridge.
Next consideration: After you confirm the light and undertone relationships, decide whether the wallpaper will function as a binder (repeat color across trims and textiles) or as a single focal accent. That choice determines how bold you can go with pattern and sheen, and whether you need sample strips at multiple wall positions.
4. Room by room recommendations with example product types
Make each room do a job, then pick the wallpaper that fits that job. Function drives choice more than trend: durability and cleanability matter in a kitchen or hallway, while pattern scale and tactile finish matter most in a living room or bedroom.
Practical product picks by room
Living room: Use a single focal wall of large-scale printed vinyl or textured non woven to anchor sofas and media units. For long runs choose straight-match repeats to cut waste and keep seams discreet. If you want depth without glare, prefer embossed 3D textures to foil across large expanses.
Bedroom: Pick quiet surfaces. Non woven linen textures or fabric-backed papers behind the bed read as luxury but remain breathable. Avoid high-sheen metallics across the whole room; keep metallics to small panels behind a headboard where light is controlled.
Dining and formal areas: Dramatic looks work here because traffic is lower. Use foil or metallic damask for short runs, but expect seams to show and plan for professional hanging. If you want impact without the installation headache, consider a custom mural printed on washable vinyl.
Kitchen: Restrict wallpaper to splashback-adjacent walls, not the cooking zone. Choose washable vinyl with a low-sheen finish and a sealed top edge. For wet or direct splash areas, recommend PVC wall panels instead of wallpaper for longevity and easier cleaning.
Bathroom: Only use 100 percent vinyl or PVC-backed wallcoverings with moisture-rated adhesive and sealed seams. For showers and wet boxes choose PVC panels or tiles; wallpaper is fine on outer bathroom walls away from direct spray if ventilation is good.
Hallways and staircases: Pick abrasion-resistant washable vinyl or heavy embossed textures that hide scuffs. Vertical motifs lift perceived height; narrow geometric repeats read crisply if installed with precise plumb alignment.
Kids room and home office: For kids use peel and stick printed vinyl for easy updates, but accept it as a medium-term solution in humid months. For home offices choose small- to medium-scale geometric or subtle textured non woven so video backgrounds look consistent under artificial light.
Ceilings and tricky features: Use subtle small-repeat patterns or matte metallics on ceilings to add interest. Only proceed if your installer can match repeats across corners and around light fixtures without excessive waste.
Tradeoff to accept: Peel-and-stick is fast and renter-friendly but often fails at edges in monsoon humidity unless you select premium adhesive grades. PVC panels and washable vinyl cost more up front but reduce rework in high-moisture areas and kitchens.
On-site example: A Thane 2BHK with an open living-dining adopted a washable vinyl on the dining half wall and a textured non woven focal wall in the living area. The team used straight-match vinyl for the dining run to minimise waste and half-drop textured panels for the living wall to keep the motif balanced behind the sofa.
Decide room function first, then pattern and material. That prevents expensive mistakes like using grasscloth where steam and grease shorten lifespan.
5. Installation methods, tools and step by step site preparation
Start with the right method for the material and the room. Choosing paste-the-wall, paste-the-paper, peel-and-stick or pre-pasted will change your timeline, waste rate and how forgiving the job is when walls are uneven or humid.
Method selection and practical trade-offs
Paste-the-wall: best for modern non-woven and heavy vinyl runs because it shortens handling, reduces edge paste squeeze-out and speeds hanging. Paste-the-paper: still useful for lightweight papers and delicate printed surfaces where you need more control at the seam. Peel-and-stick: fine for short runs or rentals but expect edge lift in sustained humidity unless you buy premium adhesive grades. Pre-pasted: convenient for small DIY jobs but inconsistent activation and storage damage are common failure points.
- Why this matters: Method affects how seams sit, how much trimming you do at ceilings and how visible the repeat match will be.
- Trade-off to accept: Faster methods increase risk of visible seams on large repeats; slower methods reduce waste but need more skill.
- Installer decision point: Hire a pro for complex repeats, ceiling runs, or textured metallics to avoid rework.
Essential tools and consumables (practical notes)
- Plumb line and laser level: precise verticals matter for geometric repeats and stripes.
- Stainless seam roller and soft smoothing brush: use the roller for vinyl seams and the soft brush to avoid stretching paper.
- Sharp scoring knife with extra blades: score and trim on a straightedge; dull blades tear edges and create visible defects.
- Paste table and brush or roller, bucket and mechanical mixer: mix adhesives to manufacturer specs; over-thinning kills tack.
- Seam adhesive and mildew-resistant paste for humid areas: only use products rated for local monsoon conditions.
- Cutting board, step ladder and protective tape: protect floor finishes and switch plates during cutting.
Step-by-step site preparation workflow
- Inspect the substrate: check for plaster cracks, high spots and flaking paint; sound, stable surfaces are non-negotiable.
- Repair and level: fill hollows, sand glossy paints and allow repairs to cure; do not paper over loose skim-coat.
- Prime or use lining paper: on very absorbent or uneven walls add a primer coat or lining paper to standardise absorption and reduce show-through.
- Mark vertical reference lines: snap a plumb for the first strip and lay out how repeats will fall across doors and windows.
- Dry-fit long runs: place a full-height trial strip to confirm match and light behaviour before pasting a whole wall.
- Isolate electrical circuits and remove plates: cut around sockets only after power is isolated and confirm with a tester.
- Plan spare material: keep extra length for future repairs and label batch numbers for warranty/reference.
Concrete Example: In a Navi Mumbai kitchen with textured vinyl, the crew primed the skim-coat, applied lining paper across the cooking wall, used paste-the-wall for the heavy vinyl, and sealed vertical seams at the splash zone with a mildew-rated seam adhesive. That sequence prevented early edge lift during the monsoon and made post-install cleaning straightforward.
Judgment you should trust: Peel-and-stick looks easy until you meet persistent humidity or uneven plaster. For medium and long runs in Mumbai-area homes, investing in proper substrate prep and either paste-the-wall installation or a professional installer saves more money than cutting corners on adhesive method.
Next consideration: schedule the installer during dry weather windows when possible and arrange a short ventilation period after adhesive application to reduce moisture-related failures.
6. Common installation mistakes and troubleshooting
Most visible failures are installation mistakes, not defective wallpaper. When seams separate, edges lift or patterns do not align, the root cause is almost always substrate preparation, wrong adhesive choice or hurried hanging. Fixing the installation process beats swapping product every time.
Visible seams and mismatched repeats
Why it happens: poor initial layout, incorrect match type handling, or trimming without accounting for vertical drop. Immediate fix: lift the affected strip, reapply using a seam adhesive for vinyl or a standard joiner glue for non woven, align with a plumb and roll the seam with a stainless seam roller. If the repeat is off by more than a half pattern, replace the strip to avoid a permanent visual error.
Bubbles, trapped paste and blisters
Why it happens: paste left to set under the paper, over stretching while smoothing, or highly absorbent plaster sucking paste away and creating dry spots. Repair: carefully cut a small slit near the bubble, inject matching paste with a small brush or syringe, smooth with a soft brush and weight the area until dry. Rehydrating based repairs are quicker than rehang, but avoid aggressive smoothing that will stretch pattern and create distortion.
Edge lifting and peeling in humid zones
Real limitation: peel and stick or standard adhesive will fail repeatedly in sustained humidity where steam or greasy deposits affect tack. Practical remedy: switch to vinyl-specific adhesives and seal exposed edges with a mildew resistant seam sealer. For direct splash areas recommend a change of finish – PVC panels or tiles – instead of repeated rework.
Color or batch mismatch after hanging
Common misunderstanding: homeowners assume slight shade differences will vanish after a few days. They do not. Always verify batch numbers before hanging. If you end up with a different batch, rehang only where large swathes are affected; avoid spot corrections because adjacent strips will show contrast.
Mistakes around fixtures, sockets and corners
Why installers fail: cutting before isolating power, or trimming in poor light produces ragged edges and gaps. Best practice: turn off circuits, remove plates, dry fit full-height strips to confirm pattern flow, then cut with a fresh blade against a metal straightedge. Use flexible corner trimming where walls are not square.
- Repair versus rehang decision: small seam gaps under 10 mm – seam adhesive and pressing works; pattern misalignment greater than one repeat – replace strip.
- Quick field test: test seam adhesive on an offcut to confirm bond and color fastness before applying to live seams.
- Documentation: photograph installed runs and note batch numbers and installer name – this saves hours if warranty or reorders are needed.
Concrete Example: A Panvel flat used peel and stick wallpaper for a small kitchen wall. During the monsoon edges lifted within weeks. The practical solution was to remove the strips, clean the substrate, use a vinyl rated adhesive and reseal vertical edges with a mildew resistant seam sealer. The homeowner avoided further rework by replacing the cooking zone cover with PVC panels later.
Judgment to act on: blaming the wallpaper brand is tempting but usually wrong. Focus first on substrate stability, correct adhesive chemistry for the material and local humidity, and a proper layout for complex repeats. If you are seeing the same failure across multiple strips, stop the job and fix the process rather than soldier on.
If problems appear during hanging, pause work. Correcting a process error early saves material and often prevents a full rehang.
Next consideration: if you are uncertain about adhesive chemistry or substrate porosity schedule a professional site check before ordering excess material. That one decision reduces visible failures and overall cost more than buying a higher priced wallpaper alone.
7. Cleaning, maintenance and lifespan expectations
Straight truth: how you clean wallpaper determines whether it stays a design asset or becomes an expensive tear-out. Cleaning method must follow the material and local conditions; the wrong cleaner or technique will remove inks, lift adhesives or flatten textures faster than normal wear.
Practical cleaning rules by material
Vinyl / washable surfaces: Wipe with a soft sponge and a diluted neutral detergent, rinse with clear water and dry immediately. Avoid bleach and solvent-based cleaners which strip topcoats. Non woven and paper-backed: Remove dust with a soft brush or vacuum on low suction; treat stains by blotting with a barely damp cloth and a gentle cleaner tested on a scrap. Natural fibres and grasscloth: Never wet-clean; vacuum, spot dust and call a conservator for oil-based stains. Peel-and-stick: Clean carefully; heat and aggressive solvents weaken adhesive bonds — test before full use.
Limitation and trade-off: Textured or embossed wallpapers disguise small scuffs and uneven plaster but trap dust and require more careful, frequent cleaning. High-reflective finishes look premium but are unforgiving — cleaning marks and surface abrasion show quickly. Choose texture for concealment and matte for easier day-to-day maintenance.
- Daily/Immediate: Blot spills right away with a dry cloth; do not rub or scrub into the surface.
- Routine: Dust or vacuum textured surfaces weekly; wipe washable walls monthly or as needed depending on exposure.
- Annual check: Inspect seams, edges and corners before monsoon season; reseal or touch adhesive where lifting begins.
Concrete Example: In a Thane flat where the kitchen opens to the living room, the specification used low-sheen vinyl for the cooking-adjacent wall and a linen non woven on the living side. The tenant wipes the vinyl weekly with a mild soap solution and dries it immediately; the non woven is vacuumed and spot-cleaned. When a seam started to lift near the stove, the installer resealed it with a mildew-rated seam adhesive and the issue did not recur.
What most people underestimate: Peel-and-stick is not inherently low-maintenance in humid climates — adhesives can creep and edges lift during extended damp spells. Likewise, steam cleaners are popular but will delaminate many wallpapers and accelerate ink migration. If humidity or grease exposure is likely, specify a moisture-rated vinyl or plan for a non-paper finish like PVC panels.
Decision guideline — repair or replace: If the issue is isolated (small seam gap, single torn strip), repair with seam adhesive or a patch from your spare strip. If damage is diffuse (fading across multiple runs, pervasive adhesive failure, or pattern delamination), replacement is usually more cost-effective than repeated repairs. Prioritize fixing substrate and ventilation problems first; otherwise the new paper will fail for the same reason.
Small preventative steps — keeping a spare strip, using the right cleaner and inspecting seams before monsoon — cost little and extend the functional life of your wallpaper far more than product grade alone.
8. Sourcing, budgeting and working with Manix Global
Sourcing and budget choices determine performance more than pattern alone. You can pick the most beautiful wallpaper design, but if the supplier does not measure, match batch numbers, or advise on the correct material for Mumbai humidity you will pay for rework later.
A pragmatic sourcing workflow
- Request physical samples first: Ask Manix Global for the exact swatch or a full-width test strip from the product page at Manix Global wallpapers. Do not rely on photos alone.
- Book a site measurement: Insist on a measured quote rather than a room estimate. A field measurement accounts for pattern match, door/window drops, and corner losses the calculator misses.
- Ask for a bundled quote: If you need laminates, PVC panels or flooring, request a combined quote so finishes are coordinated and delivery logistics are consolidated – see Manix Global PVC wall panels and laminates.
- Confirm batch documentation before delivery: Request photos of roll labels showing batch or lot numbers and delivery packing lists. If batches differ, refuse or negotiate a replacement before installation.
- Plan for installation and spare material: Get separate line items for materials and labour. Ask Manix Global to include recommended adhesive types for the material and a small spare length for future repairs.
Tradeoff to accept: Paying a small fee for a site survey and bundled quote increases upfront cost but reduces waste, prevents improper adhesive selection, and shortens installation time. Cheap online-only orders look economical until installers discover pattern repeats and substrate issues on site.
Budget brackets and how to choose within them. Think in terms of three buckets – economy, mid-range and premium. Economy suits short term or rental solutions like entry-level peel and stick or basic washable vinyl; mid-range gives durable non woven or coated vinyl suitable for living areas; premium covers grasscloth, custom digital murals and metallics where you also need more careful substrate prep and professional hanging. Choose by how long you plan to keep the finish, not just by sticker price.
Concrete Example: A Thane homeowner wanted wallpaper decor for a combined living and dining wall within a mid-range budget. Manix Global supplied three full-height sample strips, sent a measurer who noted a half-drop repeat and recommended paste-the-wall installation, and produced a bundled quote including laminate skirting. The result required one fewer roll than the online calculator predicted and reduced seam trimming time during installation.
Judgment most people miss: Suppliers who only quote material are shifting installation risk to you. Prefer suppliers who offer measurement, installation options, and post-delivery support. Manix Global works regionally in Navi Mumbai, Panvel, Thane and Mumbai and can coordinate delivery and installer referrals – use that to convert supplier convenience into lower total project cost.
Ask for a measured quote, batch photos, and a bundled finishes estimate. Small service fees up front save much larger rework costs later.