

Top Wall Decor Items to Transform Your Living Room on Any Budget
Choosing the right wall decor items is the fastest way to change a living room’s character without a full renovation. This post gives eight high impact options across low, mid and high budgets, with product examples, rough cost brackets, installation and maintenance notes, and style pairings tuned for Mumbai coastal conditions and typical apartment sizes. Whether you need a rental friendly quick fix or a durable premium feature wall, you will get practical picks and sourcing guidance to decide fast and avoid common mistakes.
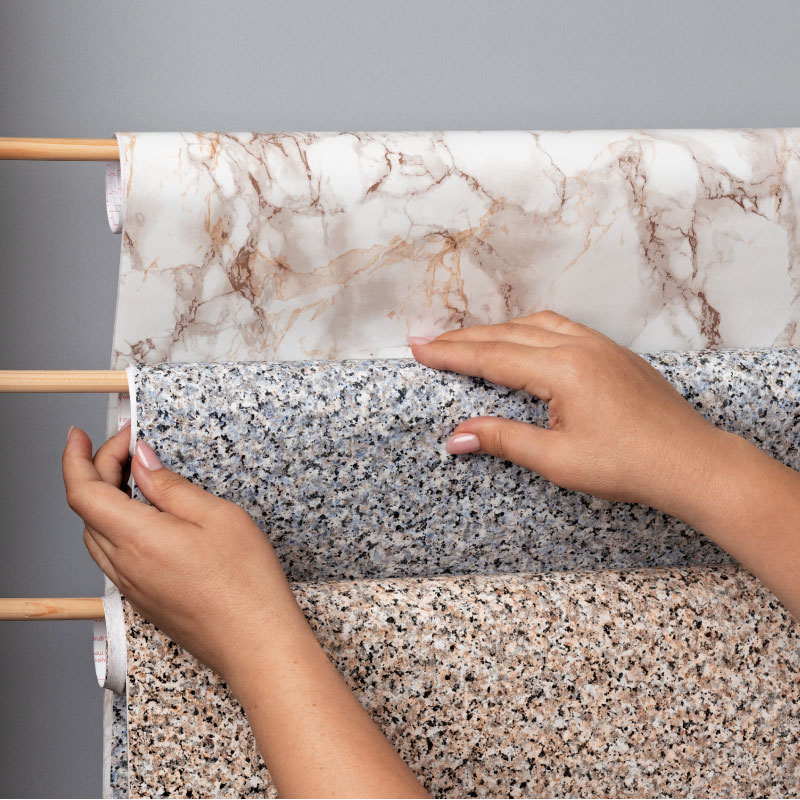
Wallpaper and 3D Vinyl Wallpaper
Direct impact with minimal mess. Among wall decor items, wallpaper and 3D vinyl deliver the fastest visible change for a living room because they do not require builders, wet trades or long drying times. For owners and renters in Mumbai the right vinyl variant gives a high end look while surviving humidity and coastal salt air better than traditional paper.
Budget and when to choose each. Peel and stick printed wallpaper is the low cost route for a small accent wall and can come in under INR 5 000. Mid tier 3D vinyl or embossed vinyl runs cost between INR 10 000 and INR 25 000 for a moderate sized wall depending on texture and print. Designer papers with metallics or heavy emboss rise further in price and usually justify professional installation.
Installation and durability trade offs
- Wall preparation matters. Wallpaper requires smooth, well primed plaster or a plywood substrate. Skipping prep produces bubbles and early failure.
- Peel and stick for rentals, paste for permanence. Removable vinyl is a sensible rental choice; permanent pasted paper reads better long term but is harder to remove cleanly.
- Humidity and adhesive selection. Use waterproof vinyl and acrylic adhesives in coastal climates to avoid edge lift. Traditional paper will delaminate faster in Mumbai conditions.
- Pattern scale and light. Large geometric or mural patterns amplify small rooms; choose smaller repeats or lighter tones for cramped living rooms with poor daylight.
- Seams and matching. 3D embossed vinyl hides minor substrate flaws but still needs seam matching and skill. Budget installers often undercut on alignment and leave noticeable joins.
Concrete example: In a 12 by 10 foot Navi Mumbai living room a homeowner I worked with chose a wipeable geometric vinyl from a Graham and Brown collection installed behind the sofa. They ordered 10 percent extra for pattern repeat, hired a recommended installer for a half day, and paid about INR 12 000 including adhesive and primer. Result: high impact without repainting and easy maintenance with a damp cloth.
Practical judgment. Do not pick wallpaper purely on print if your wall has imperfect plaster or moisture history. In practice the best outcomes pair vinyl with a thin ply substrate or a skim coat and professional hangers. Samples matter more than catalog images – test under your living room light and next to the actual sofa and curtains before buying.
For renters choose removable vinyl; for long term installs invest in professional paste application and waterproof vinyl for coastal climates.
MDF Fluted Panels and Decorative MDF Cladding
Direct point: Fluted MDF delivers the quickest visual upgrade among midrange wall decor items, but it only looks premium when installed and detailed correctly. Use prefinished or laminated panels in humid Mumbai locations rather than raw painted MDF.
Installation and build details that matter
Key fit practice: Fix fluted MDF to a stable substrate – plywood or MR grade MDF battens – with adhesive plus screws into furring strips. Leave small expansion gaps at edges and seal exposed edges with laminate tape or PU sealant to prevent moisture ingress.
- Material choice: Use BWR or MR grade MDF for coastal humidity and prefer prelaminated finishes or PVC cladding for long term durability.
- Jointing: Butt joints look cheap. Use concealed vertical trim or mitred edges and a slim reveal where panels meet skirting or ceilings.
- Lighting integration: Plan for LED profiles in the flute recesses during install to avoid cutting grooves afterwards.
- Serviceability: Panels are repairable in sections but replace single panels rather than attempting large in situ repairs when water damage occurs.
Trade off to accept: Prefinished fluted MDF costs more than painted MDF but saves you repaint cycles and drywall dust. If you skimp on edge sealing and substrate, the aesthetic fails faster than the initial saving justifies.
Concrete Example: A 3.2 m by 2.4 m feature wall in a Navi Mumbai apartment used prelaminated walnut fluted MDF panels from a local supplier with MR backing, installed over plywood furring. Total cost including labour and LED strip backlighting landed around INR 18 000. The wall stayed maintenance free for two years; only light dusting was required because edges were sealed properly.
How to choose pattern, scale and finish
Scale matters: Narrow flutes make small rooms feel taller. Wide flutes create a bolder statement but can look heavy in compact living rooms. Test a full height 600 mm sample before committing to the whole wall.
- Style pairing: Fluted MDF pairs best with minimalist furniture, warm wood veneers and concealed LED accents for a contemporary look.
- Avoid: Heavy patterned wallpaper or large gallery walls directly over fluted panels – the competing textures fight the room focal point.
- Sourcing: Compare CenturyPly and Greenply compatible MR grade options and check local availability at Manix Global before ordering to match profiles and finishes.
Laminates and Natural Veneer Feature Walls
Big point: Laminates and natural veneers are among the most effective wall decor items when you want a true timber look without the cost or structural work of solid wood. They produce a continuous, furniture-quality surface that reads as high end in photos and in everyday use — provided you pick the right substrate and finish.
Budget and brands: Expect this category to sit in the mid to high bracket. Typical laminate feature walls using Greenlam or Formica on an MR plywood substrate commonly land between INR 15 000 and INR 60 000 depending on wall area, pattern match and edge details. Natural veneer panels from Greenply or CenturyPly push the budget higher because of sealing and framing requirements. For sourcing, check Manix Global for laminates and veneer-compatible substrates and view product options at Greenlam or Formica India.
Installation realities
Practical installation: Laminates and veneers must be bonded to a stable substrate – usually MR/WR plywood or MDF – and not applied directly to brick/plaster. Use waterproof adhesives and allow expansion gaps at edges. Plan seams where furniture joins or behind shelving to hide joints. Full installation for a single 10 by 12 foot wall typically takes 1 to 3 days with a small crew; veneer jobs add time for sealing and on-site finishing.
Climate trade-offs: Laminates handle Mumbai humidity better than raw veneer. High-pressure laminates are wipeable, resistant to staining and require minimal climate control. Natural veneer looks superior up close and can be refinished, but it needs good sealing, indirect sunlight and stable indoor humidity or it will cup, delaminate or darken unevenly.
- Edge and seam planning: keep seams vertical and align grain direction to avoid a patchwork look.
- Substrate: use MR plywood or marine-grade where possible; avoid bare gypsum as the primary bond surface.
- Finish choice: textured matt laminates hide fingerprints; gloss laminates show flaws but read larger in small rooms.
- Fire and VOCs: verify fire rating and low-VOC adhesives for apartment installs.
Concrete use case: A living room in Navi Mumbai where AC runs occasionally: fit Greenlam textured HPL over 6mm MR plywood, routed channels for LED strip backlighting and black metal skirting. Cost including materials and labour for a 12 square foot feature wall: about INR 25 000 to 35 000; install time 2 days. If the client insisted on a walnut veneer instead, add sealing and climate controls and expect another 30 to 50 percent on cost.
Judgment you need: If you want low maintenance, consistent colour and humidity resilience choose high-quality laminate. If you are buying for resale or want a tactile, refinishable surface and can control indoor conditions, choose veneer — but accept higher cost and maintenance. Many effective living room schemes use laminate as the workhorse and a veneer or real-wood insert as a visual hero.
Mirror Engraved Panels and Mirrored Feature Sections
Clear effect: mirrored sections are the fastest way to increase perceived space and bounce light, but they are not a cosmetic afterthought – they change how a living room reads and how you must manage reflections, glare and humidity.
Material choice matters: glass mirrors, laser engraved glass, and acrylic mirrored panels are all used in feature sections. Glass gives crisp reflection and resists scratching, acrylic is lighter and cheaper but scratches and can yellow if exposed to strong sunlight, and engraved glass adds pattern without extra visual weight.
Practical tradeoffs and when to choose mirrored wall decor items
- Use mirrors when natural light is limited: a narrow Navi Mumbai living room with a single window benefits more from mirrored panels than a bright, already reflective space.
- Avoid full wall mirrors behind screens or fireplaces: mirrors amplify heat and screen glare and create doubled focal points; use framed strips or inset panels instead.
- Engraving vs plain mirror: engraved mirror panels add pattern and disguise fingerprints; they require specialist cutting and cost more but look more intentional than a plain sheet.
Installation and durability note: mirrors must have safety backing or be laminated to plywood/MDF with sealed edges. In humid coastal conditions the silver backing can corrode (black spot). Specify moisture resistant backing, edge sealant, and a ventilated mounting frame or choose acrylic mirrored panels with UV-stable coatings if condensation is unavoidable.
Concrete example: a 10 by 12 foot living room in Thane used a 2.4 m by 1.8 m engraved mirror panel behind the sofa framed in matte black aluminium with concealed LED tape. The panel cost around INR 18 000 installed; it visually doubled depth and improved evening light, but required a dehumidifying silica gel pack in the frame and periodic inspection for black spot at the corners.
- Budget bracket: small accents under INR 10 000, mid sized engraved features INR 15 000 to 40 000 depending on cutting complexity and safety backing, large seamless systems run higher.
- Pros: amplifies light, creates perceived space, pairs well with darker furniture and integrated LED strips.
- Cons: shows clutter and fingerprints, can cause glare on TVs, needs moisture protection in coastal climates.
Important – specify safety film or laminated mirror backing and ask your installer for corrosion-proof edge sealing if the project is in Navi Mumbai, Panvel or Thane.
Where to source and combine: for bespoke engraved mirror panels request local fabrication quotes and compare glass mirror vs laser cut acrylic alternatives. Manix Global lists mirror engraved panel options and can advise on compatible substrates and installation accessories – see Manix Global.
PVC Wall Panels and uPVC Decorative Panels
Straight fact: for humid, high-traffic Mumbai living rooms PVC and uPVC panels deliver the best mix of speed, cost and durability among wall decor items. They are waterproof, lightweight and install with minimal dust compared with wet finishes.
Trade-off to accept: PVC panels never fully mimic real timber or natural stone. If you want authentic grain and aging over decades, choose veneer or engineered wood. PVC wins when you need low maintenance, easy cleaning and quick installation.
Practical differences – when to pick PVC vs uPVC
- PVC panels: thinner, flexible, lower cost – best for accent walls, TV backs, kids rooms and rental flats. Expect small accent jobs under INR 5 000 and full walls in the INR 15 000 40 000 band depending on profile and finish.
- uPVC decorative panels: thicker, more rigid, improved fire and structural properties – better for areas needing heavier profiles or integrated channels for LEDs. Price moves toward the mid range.
- Installation note: both use tongue-and-groove or click systems; heavier uPVC may require furring channels and screws rather than adhesive alone.
Real-world example: A Navi Mumbai apartment used PVC wood-grain panels as a TV feature wall with concealed LED cove. Installed in one day, materials plus labour ~INR 7 500. After two monsoons the panels remained stain-free; a top corner near a sun-facing window showed slight thermal expansion and needed a trimmed corner – an easy fix but a real-life maintenance hit.
Installation and durability considerations: always check for FR or flame-retardant ratings if the wall backs a TV or fireplace, and insist on expansion gaps at perimeter trims. Avoid solvent cleaners and direct high heat on glossy finishes. In coastal climates choose UV-stable finishes to limit yellowing.
- Combine wisely: use PVC panels for the lower or high-contact zones and pair with wallpaper or framed wall art above to avoid visual flatness.
- Seams and edges: use U-channels at vertical joins and silicone at bottom edges to stop moisture ingress and to make panels replaceable.
- Supplier tip: source panels and accessories together – for example, Manix Global lists PVC Wall Panels and uPVC Wall Panels and can coordinate trims and installation advice.
Bottom line: choose PVC/uPVC when you prioritise affordability, waterproofing and fast install. Skip it only when you need authentic natural materials or expect exposure to sustained high heat or open flames.
Vertical Garden Systems and Living Wall Modules
Straight talk: living walls are one of the most visually transformative wall decor items you can add to a living room, but they introduce real structural, irrigation and maintenance requirements that many homeowners underestimate.
System types and tradeoffs: modular pocket planters, tray based panels with integrated drip irrigation, and artificial green panels are the common routes. Modular live systems give authentic texture and seasonal change but need a water supply, drainage path and periodic pruning. Artificial systems remove the maintenance and moisture risk but read flat at close range and age differently under Mumbai sun and dust.
- Cost brackets: DIY felt pockets or small DIY frames under INR 3,000; mid range modular kits with basic drip irrigation INR 8,000 to INR 20,000 for a small feature; professionally designed living walls with integrated irrigation, filtration and installation typically start above INR 30,000.
- Structural and waterproofing: lightweight felt or plastic modules are best for drywall or plywood backing; larger installations need cement board or reinforced frame and a drainage tray to avoid moisture transfer to the wall.
- Light and species choice: position near windows or use LED grow lights on timers; choose resilient species like pothos, spider plant, philodendron and ferns for indoor setups in coastal humidity.
Concrete example: a 1.2 by 2 meter living wall installed in a Navi Mumbai apartment used modular PET pockets, a small reservoir fed micro drip system and a lacquered plywood backing with a concealed drain to a balcony outlet. Installed cost was about INR 22,000 including two low wattage grow lights and a 6 month maintenance visit from the installer. The owner reported the green look changed the perceived room temperature and softened hard sight lines more than it improved air quality.
Practical judgment: if your priority is immediate aesthetic impact with minimal risk choose high quality artificial panels or a mixed approach – live plants where light and access are available and artificial panels in low light corners. Expect real air quality benefits only from large plant coverage and active maintenance, not from a single small panel.
Installation checklist
- Confirm load and backing: use cement board or marine plywood for installations larger than 1 square meter.
- Plan drainage: include a catch tray and routed outlet to a nearby drain or balcony.
- Choose irrigation type: passive wick for tiny pockets, micro drip with reservoir for modular systems, or none for artificial panels.
- Protect the wall: add a moisture barrier and anti fungal liner to prevent mould in coastal climates.
- Service access: ensure the top rows are reachable for pruning and replacing plants or modules.
Next consideration: if you plan to pair a living wall with other wall decor items pick adjacent textures that tolerate moisture – sealed veneers, laminates or metal accents – and avoid untreated fabrics or raw wood in the immediate splash zone.
Accent Lighting and Integrated LED Profiles
High impact per rupee: accent lighting and integrated LED profiles often change how an entire wall reads without the cost and dust of new cladding. When used correctly, lighting is one of the most effective wall decor items to add depth, reveal texture, and direct attention in a living room.
Profiles matter more than strips alone: aluminium channels with diffusers are the practical core of integrated systems. They act as heat sinks, protect LED strips from humidity, and produce an even light wash. Choose recessed channels for a seamless look if you can run a shallow groove; choose surface-mount channels when you need a no-demolition retrofit.
Technical tradeoffs that change performance
Key tradeoff: cheaper strips look fine for photos but fail fast in real rooms. The real durability difference is driver quality and thermal management. Use an aluminium profile and a matched constant current driver to get predictable life and consistent brightness, especially in Mumbai humidity where heat and moisture shorten cheap LEDs life.
Practical specs to choose by: prefer warm 2700 3000K for living rooms, CRI 90 or above for framed wall art and textiles, and LED density around 120 240 LEDs per metre for an even wash. For runs over 5 metres plan power injection points to avoid voltage drop and uneven brightness.
Concrete example: fit a 3 metre fluted MDF feature with a recessed aluminium channel and opal diffuser. Use a 14 4 W/m 3000K LED strip with a 24 W constant current driver and install the channel 40 60 mm behind the panel edge to create soft shadow lines. In practice this costs roughly INR 8 000 to 15 000 including materials and electrician labour for a single feature wall and gives a salon quality look without recladding.
- Placement considerations: avoid direct reflections into the TV and seating lines; test mockups with a temporary strip before fixing.
- Moisture and IP: use IP20 for enclosed channels, IP54 or higher for exposed bathroom adjacent walls; seal channel ends to reduce humidity intrusion.
- Controls and zones: fit dimmable drivers and group strips into 2 3 zones so you can layer ambient and accent light without complex wiring.
- Integration: aluminium profiles slot into fluted MDF, laminates and ACP edges; suppliers such as Manix Global stock compatible channels and accessories.
Lighting is not an afterthought. Good profiles and drivers cost more up front but extend life and keep installers from returning to fix flicker or heat damage.
Final judgment: for most living rooms accent lighting delivers more measurable impact than an expensive change of finish. Pick quality channels and drivers, avoid relying on coloured LEDs as the primary source, and plan wiring and zoning up front so the lighting becomes a durable layer in your wall decor items strategy.
Decorative Cladding ACP Gypsum or Corian Panels
Straight talk: decorative cladding using ACP, gypsum or Corian turns a wall into a single, intentional design plane — not a patched-together feature. These are high-impact wall decor items best used where permanence, clean lines and a premium finish matter more than DIY flexibility.
Material differences that matter
- ACP (Aluminium Composite Panel): lightweight metal-faced panels available in metallics, stone and wood-effect finishes; needs ventilated framing and expansion joints to avoid buckling.
- Gypsum decorative cladding: good for carved or textured tiles and reliefs; cheaper than Corian but requires proper sealing and is vulnerable to prolonged moisture if left unprotected.
- Corian/solid surface: seamless, repairable and non-porous; thermoformable for curved details but expensive and heavier — needs a sturdy substrate and specialist installers.
Practical trade-off: ACP gives a crisp metallic or stone look at lower cost than natural materials, but ordinary ACP panels can fail fire tests required in multi-storey apartments. Insist on fire-rated panels or use interior-rated alternatives; otherwise you risk rejection from building committees in Mumbai.
Installation, performance and maintenance
- Substrate and fixing: ACP and Corian require a level plywood or aluminium subframe; gypsum attaches to studs or plywood backing. Poor substrate causes visible waves or loose panels later.
- Seams and detailing: Corian can be chemically bonded and sanded to invisible joints; ACP needs precision cuts and metal trims — visible joints are common unless planned as part of the design.
- Humidity and moisture: gypsum cladding must be primed and painted with moisture-resistant finishes; Corian and ACP are much more tolerant of coastal humidity but check edge seals to stop moisture trapping.
- Repairability: Corian is the easiest to repair on site; ACP dents and scratches are harder to fix without replacing panels.
Concrete example: In a 12 x 10 ft living area in Navi Mumbai I specified a Corian feature wall with concealed TV niche and backlit channel. Installation took five days (substrate, bonding, finishing) and cost roughly INR 60 000 90 000 depending on the Corian grade and LED detailing — a higher upfront spend but the wall required minimal maintenance and hid wiring cleanly for years.
What people get wrong: many homeowners choose ACP for interior use because of appearance and later discover the panels were non-fire-rated or poorly ventilated, leading to warping or building approval issues. Treat ACP as a technical product, not just decor; demand specs and installation drawings from suppliers like Manix Global before you commit.
Takeaway: Decorative cladding is a statement that demands technical decisions — check fire rating, subframe, seam treatment and repairability before paying for the finish.